Shake It Like A Polaroid Picture
As promised, I’m back with the details on my recent priming/painting adventures. I intended to post this yesterday, but real life got in the way. Rude.
Here’s what you’ll need: fine grit sandpaper, a screwdriver, primer, paint, painter’s tape, and two paintbrushes.
To start with, I unscrewed the hinges on the cabinet doors and removed them. And here’s a helpful tip: if said cabinet happens to be over your toilet, close the lid. I was thisclose to doing some unpleasant fishing for a screw. It’s also a good idea to put all your screws and hinges in a plastic bag so that you don’t lose anything.

Now is also the time to fill in or make new holes depending on whether or not you’re going to replace the hardware. I bought some new cabinet pulls that luckily fit in the holes that were already there so I didn’t have to worry about it. Otherwise, you could fill any pre-existing holes with wood filler and make new ones.
Next, you’ll want to sand down all the surfaces you plan to paint. This will rough up the surface and make it a lot easier to cover with paint. There are some cases where sanding isn’t necessary, but I think it’s easier to do it in the beginning rather than take the risk of getting less than stellar paint coverage. A quick once over with a fine grit sanding block should do the trick.

Un-sanded vs. Sanded. See the difference?
After you’ve sanded, make sure to wipe off all excess dirt and dust with a clean cloth. Now you’re ready to prime! My primer of choice is Kilz Odorless. I love it. It dries in 30-60 min and, as the name may imply, there’s no headache-inducing smell. It’s fantastic! Make sure and shake your primer up really well, it should have the consistency of paint. This is where hubby came in. He’s the official paint shaker..and yes, I danced around the room and encouraged him to “shake it like a polaroid picture!” I don’t know that there’s any real technique to priming..just paint on a thin, even coat and wait for it to dry. And primer is pretty much impossible to get out of paintbrushes so don’t plan on using that same brush for the actual painting.
Once you’ve waited the appropriate amount of time (look on your can of primer, it will tell you how long to wait), you can start painting. Some tutorials suggest using a roller brush, but I prefer to use an angled paintbrush. It helps get into all those nooks and crannies. I used Olympic Premium in the white semi-gloss right off the shelf. Olympic Premium has no VOCs (Volatile Organic Compounds), which basically means there’s no harmful chemicals for you or the environment. Score. Again, just paint on a thin, even coat. It will take 2-3 coats in order to get a good amount of coverage. Your paint can will tell you the recommended wait time between coats.
Now the process for trim is basically the same. Light sand, wipe down, prime, paint. The main difference comes with the taping. Not only did I have to tape off the floor, but because my walls are already painted, I had to tape off the wall as well. Double taping. Ugh. I try my best to work my tape in between the trim and the wall if I can. Luckily there’s enough of a gap between my trim and the wall that it really wasn’t that difficult. Yayy for shoddy construction! Also, if you’re painting trim around a door, make sure to wrap tape around any hinges and inside the casing on the strikeplate. I was painting my trim, but not my doors so I also taped off the top of my door to avoid any drippage.

And then the waiting begins… Most sources advise waiting 3-5 days before rehanging your doors. That was the most tortuous part for sure. I could see my beautiful, fresh white doors and my beautiful, fresh white cabinet but I just couldn’t put the two together! But I didn’t want to risk smudging my new paint job, so I waited. And after I was sure that they were dry, I rehung them and screwed in the new knobs. They’re from the allen + roth line at Lowe’s and they are pretty fantastic.

You love them, don’t you? Me too! Just the touch of old Hollywood-esque glam I was looking for 😀
And here’s the finished cabinet


Gratuitous knob shot.
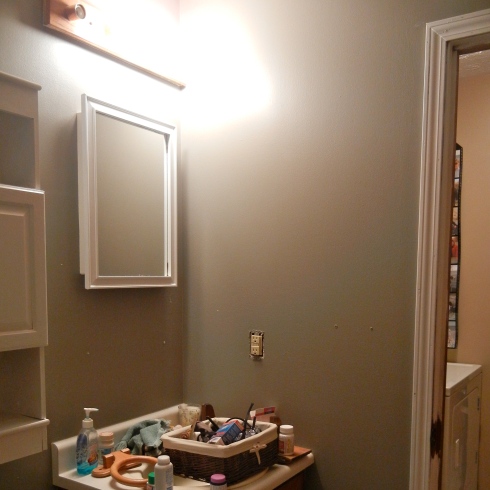
And here’s a wider shot of the bathroom so you can see the trim as well

Shoot that light switch cover is straight awful.
I’ve got some touch ups to do, and it’s definitely still a work in progress but so far I’m digging the change. The white really brightens up the space!
Have you guys been doing any makeovers in your own home?


Failure Is Always An Option « Lemon Drop Life replied:
[…] far I’ve painted the cabinets/trim and changed out the hardware. You can read more about that here. Then on Saturday, my stencil finally arrived! I was so excited that I immediately ran out to get […]
June 20, 2011 at 6:03 pm. Permalink.
Whitney replied:
LOVE the knobs!!! What colors are you decorating with in here?
We haven’t worked on our house in awhile. I have a list as long as a football field of all the things we need to paint. You’ve inspired me to get crackin! 😀
June 16, 2011 at 10:42 am. Permalink.
jdparnell replied:
I’m going for a glam, Old Hollywood type vibe. So the walls are a dark grey and then I’m just going to use mainly white and gold accessories! This is the biggest project I’ve taken on so far for our house so I’m pretty excited!
June 16, 2011 at 10:34 pm. Permalink.
Whitney replied:
Sounds amazing!!! Can’t wait to see it all done 🙂
June 17, 2011 at 12:04 am. Permalink.